Live Edge Floating Shelves: 10 Best Ways to Maximize Space!
Did you know that over 70% of homeowners in the U.S. are looking for innovative ways to combine storage and style in their living spaces? Live edge floating shelves have emerged as a stunning solution, blending practicality with natural beauty. These shelves not only save space but also add a unique, organic touch to any room.
What makes these shelves so special? They combine the rustic charm of natural wood with a sleek, modern design. By choosing high-quality wood and the right tools, you can create a functional and visually appealing storage solution. Whether you’re a DIY enthusiast or a homeowner looking to enhance your interior decor, this guide will walk you through everything from material selection to installation techniques.
Ready to get creative? Explore innovative ways to mount and style your shelves, transforming any wall into a focal point of your home. With the right approach, you can turn empty spaces into showcases for your personality and style.
Key Takeaways
- Combine rustic charm with modern design using live edge floating shelves.
- Choose high-quality wood for durability and aesthetic appeal.
- Explore creative mounting and styling techniques.
- Transform any wall into a focal point in your home.
- Follow expert tips for material selection and installation.
Introduction
Welcome to our guide on creating stunning float shelves that bring modern style and natural beauty to your home. Whether you’re a DIY enthusiast or a homeowner looking to enhance your space, this guide will walk you through everything you need to know.
Imagine transforming your kitchen, living room, or home office with a modern storage solution that doubles as a design statement. Our step-by-step insights will show you how to build and install these shelves like a pro, just like in those inspiring DIY video tutorials you’ve seen online.
One of the key secrets to success is careful planning. Measure your space down to the inch and order your supplies with precision. This ensures your project turns out exactly as you envision it. The perfect blend of modern design and natural materials makes these shelves a standout feature in any room.
“explore stylish wooden wall decor ideas for small spaces”
| Space | Design Balance | Required Steps |
|---|---|---|
| Kitchen | Modern meets natural | Measure, cut, install |
| Living Room | Rustic charm with sleek lines | Plan, build, mount |
| Home Office | Functional elegance | Design, assemble, secure |
With this guide, you’ll master the art of creating storage solutions that are both functional and beautiful. Let’s get started!
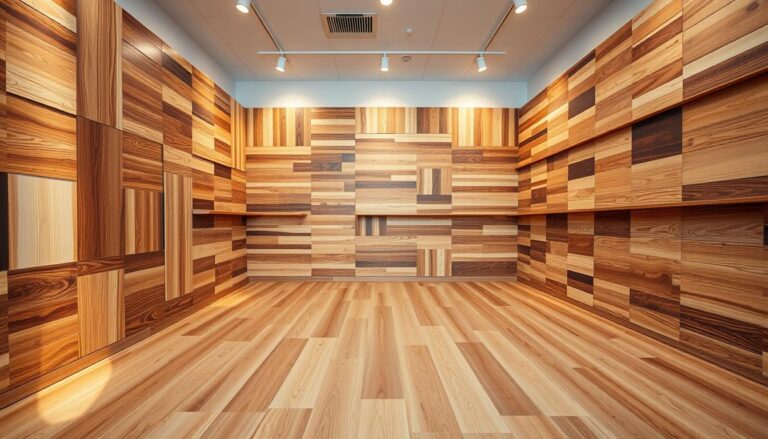
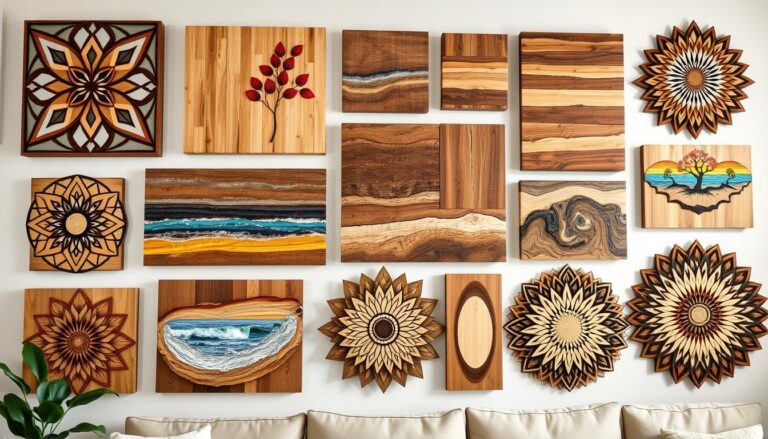
The Beauty of Live Edge Floating Shelves
Live edge floating shelves are more than just storage solutions; they are works of art that bring nature indoors. The organic lines and distinctive grain patterns of live edge wood create a unique aesthetic that captivates the eye. Each piece tells its own story through natural imperfections and unique grain details, making every shelf a one-of-a-kind addition to your space.
The contrast between the modern floating design and the rustic natural materials is striking. For instance, a live edge shelf in a sleek living room can become a picture-worthy focal point, drawing admiration from all who enter. Products on Amazon and other curated sources often highlight similar natural beauty, proving that this style is both popular and timeless.
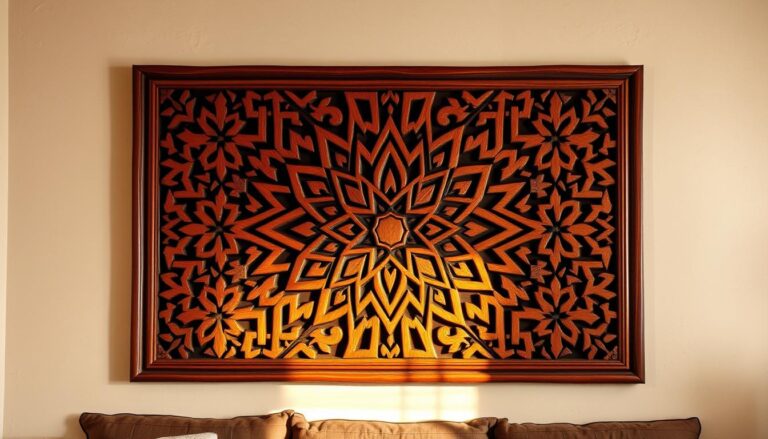
“add an exotic touch with Moroccan wood wall art”

Integrating nature into home decor creates an emotional connection. Many customers share stories of how live edge shelves have transformed their spaces, adding warmth and character. The ring of design inspiration from influential online tutorials further showcases the versatility of these shelves, encouraging homeowners to embrace their natural charm.
Essential Materials and Tools
Creating stunning storage solutions starts with the right materials and tools. Whether you’re working with oak or other hardwoods, having top-quality tools ensures precision and ease.
A dust mask is a must-have for protecting yourself during planing. Pair it with a shop vac to keep your workspace clean and dust-free, making the process safer and more efficient.
For mounting, high-quality hardware is crucial. You can find a wide range on Amazon or at local shops. Metal tools, like stud finders and electric planers, are essential for precise cuts and a secure installation on the wall.
Measurements matter—ensure your materials are the right size in inches to fit your space perfectly. Even small details, like choosing durable oak, can make a big difference in the final result.
| Tool/Material | Purpose | Source |
|---|---|---|
| Wood Logs | Shelf base | Local shops |
| Hatchets | Shaping wood | Amazon |
| Mallets | Gentle tapping | Hardware stores |
| Dust Masks | Safety | Amazon |
| Electric Planers | Smoothing wood | Local shops |
| Stud Finders | Locating wall studs | Amazon |
| Tape Measures | Accurate measurements | Local hardware |
| Saws | Cutting wood | Local shops |
| Mounting Hardware | Secure installation | Amazon/local shops |
With these tools and materials, you’ll be well-equipped to create a beautiful and functional storage solution for your home.

Selecting and Preparing Your Wood
Selecting the right wood is the first step in creating beautiful shelves. Look for a straight section of wood that’s free of knots and insect damage. A minimum diameter of 8 inches is ideal for stability and aesthetics.
Identifying Quality Wood
When choosing wood, consider species like oak or maple for their durability and attractive grain patterns. These woods are not only sturdy but also add a touch of natural elegance to your space. The wood’s natural imperfections can become unique design elements, making each shelf one-of-a-kind.
Prepping the Wood for Cutting
Before cutting, mark the wood with a straight edge and pencil to ensure accurate measurements. Plan carefully to meet your shelving needs. For precise cuts, use a saw, and consider smoothing the surface with a planer. Consistent methods, like those shown in DIY videos, will help you achieve professional results. Remember, accurate measurements are key to a successful project.
| Wood Type | Key Characteristics | Ideal Uses |
|---|---|---|
| Oak | 8-inch diameter, knot-free | Shelves needing strength |
| Maple | 8-inch diameter, light grain | Shelves requiring a smooth look |

Visualizing Your Shelf Design
Before you start cutting, take the time to sketch and measure your layout on paper. This step is crucial for ensuring your design fits perfectly in the available space. Accurate measurements of the length and space will help you achieve a balanced look that complements your room.
Sketching and Measuring Your Layout
Modern design principles can enhance your project. Consider clean lines that contrast beautifully with the natural feel of the wood. For instance, a sleek, minimalist shelf can highlight the organic charm of the material, creating a striking visual contrast.
A detailed sketch allows you to foresee potential installation challenges. It also helps you avoid mistakes by visualizing the final result. Some designers even incorporate a ring as a design accent, adding a unique touch to their work. Seeing your design concept clearly is the first step in bringing your vision to life.
A well-planned design makes the rest of the process easier. With a clear plan, you can proceed confidently, knowing your shelf will be both functional and stylish. This approach ensures your project turns out exactly as you imagine it.

Techniques for Splitting and Hewing the Wood
Mastering the art of splitting and hewing wood is essential for creating durable and visually appealing edge floating shelves. This process requires precision and care to ensure the wood remains stable and attractive.
Using Hand and Power Tools Effectively
Start by scoring the wood with a hatchet, using gentle yet firm strikes. A wooden mallet can help deepen the score without damaging the surface. For larger slabs, consider using metal tools like wedges to extend the crack. Power tools, such as electric planers, can also be employed for smoother results. Hand tools are ideal for precise control, while power tools save time and effort.
Safety Tips for Wood Splitting
Always wear protective gear, including safety glasses and gloves, when splitting wood. Ensure your workspace is clear of debris and tripping hazards. Video tutorials often demonstrate safe handling techniques. Proper tool handling is crucial to avoid accidents and achieve clean splits. For additional resources, visit Amazon for a wide range of safety equipment and tools.
| Tool Type | Usage | Benefit |
|---|---|---|
| Hand Tools | Scoring and precise splitting | Precision control |
| Power Tools | Fast, smooth cuts | Time efficiency |
| Metal Wedges | Extending cracks | Effective splitting |
By following these techniques and safety guidelines, you can successfully split and hew your wood, laying a strong foundation for your edge floating shelf project. Remember, patience and careful technique will yield the best results.

Planing and Smoothing the Shelf Surface
Planing and smoothing the wood surface is a crucial step in creating a professional-looking floating shelf. This process ensures the wood is even and free of imperfections, making it both visually appealing and durable.
Choosing Between Electric and Hand Planers
When it comes to planing, you have two main options: electric planers and traditional hand planers. Electric planers offer speed and efficiency, making quick work of large surfaces. However, hand planers provide precision and control, ideal for fine-tuning and achieving a smooth finish without the noise and mess of power tools.
Both tools can yield professional results if used correctly. Electric planers are perfect for initial smoothing, while hand planers are great for final touches. The choice depends on your preference for speed versus precision.
Safety first! Always wear a dust mask and use a shop vac to manage debris. These precautions make the process safer and more efficient, even though planing can be messy.
A smooth surface enhances the shelf’s appearance and durability. It also ensures that any finish, like stain or sealant, adheres evenly. While planing requires patience, the end result is well worth the effort, making your project both easy and rewarding.
To maintain the wood’s top quality, work carefully and avoid over-planing. A well-planed surface sets the stage for a flawless finish, ensuring your floating shelf looks its best for years to come.

Sealing and Finishing the End Grain
Properly sealing the end grain of your wood is a critical step in ensuring the longevity and beauty of your shelving project. Moisture can seep into the wood if not properly sealed, leading to cracks and checks over time. This is especially important for natural wood surfaces that are exposed to varying humidity levels.
Preventing Cracks and Checks
To prevent moisture from damaging your wood, apply a high-quality sealant immediately after planing. Options include latex, acrylic, or specialized epoxy finishes. These sealants create a protective barrier that repels moisture and prevents the wood from drying out too quickly.
Allow the wood to reach the optimal moisture level before applying any finish. This ensures the sealant adheres properly and provides long-lasting protection. A well-sealed surface not only preserves the natural grain but also enhances the overall appearance of your shelving.
Hidden techniques, like applying thin coats and allowing proper drying time, contribute to a professional finish. Consistency is key—ensure each coat is even and covers the entire surface. With careful application, your shelving will have a flawless look that stands the test of time.

Final Measurements and Custom Cuts
Precision is key when it comes to final measurements for your floating shelf. Every inch counts, and accurate cuts ensure a perfect fit. Use a meter stick and a 90-degree angle ruler to measure the length and size of your shelf, ensuring it aligns with your space.
Before cutting, double-check your measurements against the size you need. This step prevents costly mistakes and ensures your shelf fits securely. Custom cuts can enhance both the appearance and functionality of your shelving, making it a polished piece of furniture.
| Shelf Size (inches) | Length | Ideal Use |
|---|---|---|
| 72 | 8-10 | Large spaces, heavy items |
| 48 | 6-8 | Medium rooms, decor |
| 36 | 4-6 | Small areas, light items |
Order your hardware based on these precise measurements to ensure a flush installation. Remember, every inch transforms a natural slab into a beautiful, functional shelf. Double-checking dimensions guarantees a secure and attractive result.

Installation Techniques for live edge floating shelves
Installing live edge floating shelves requires precision and the right hardware to ensure a secure and sleek finish. Start by locating the wall studs using a stud finder, which helps in determining the best spots to mount your brackets. This step is crucial for supporting heavy oak slabs and ensuring stability.
Next, align your mounting fixtures carefully. Use pre-drilled holes in the hardware to fit the shelf snugly against the wall. Hidden brackets are a great option for achieving that modern, floating look. They create a seamless appearance while providing strong support.
| Mounting Style | Hardware Needed | Benefits |
|---|---|---|
| Hidden Brackets | Sturdy metal brackets | Sleek, modern look |
| Standard Brackets | Wall anchors, screws | Easy installation |
| Adjustable Brackets | Spring-loaded arms | Flexibility in positioning |
For a professional finish, slide the shelf onto the pre-mounted hardware and ensure it’s level. Double-check all connections to guarantee safety and durability. Remember, proper hardware is essential for secure attachment to wall shelves, ensuring they remain stable and visually appealing. With these techniques, you’ll achieve a minimalistic, modern finish that enhances your home decor.

Mounting Hardware and Secure Installation
Secure installation is the backbone of a sturdy floating wall shelf. To ensure your shelves remain stable and level, proper mounting hardware and techniques are essential. Start by locating wall studs using a stud finder, which helps in determining the best spots to mount your brackets. This step is crucial for supporting heavy oak slabs and ensuring stability.
Using a Stud Finder and Drill Guide
Using a stud finder and drill guide ensures precise placement of mounting hardware. Drill holes at the correct depth to accommodate heavy-duty hardware, rated up to 50 lbs or more, for reliable support. Aligning mounting brackets with both metal and hand tools ensures precise cutting and a secure fit. Use shop tools to ensure the shelf is stable and level, providing a professional finish.
- Locate wall studs with a stud finder for secure bracket placement.
- Drill holes at the correct depth for heavy-duty hardware support.
- Align brackets using metal and hand tools for precise cutting.
- Use shop tools to ensure stability and a level installation.
Accurate measurements in inches are vital for a uniform installation. Selecting high-quality hardware from Amazon enhances durability and ensures a long-lasting setup. By following these techniques, you’ll achieve a secure and lasting floating wall shelf installation.
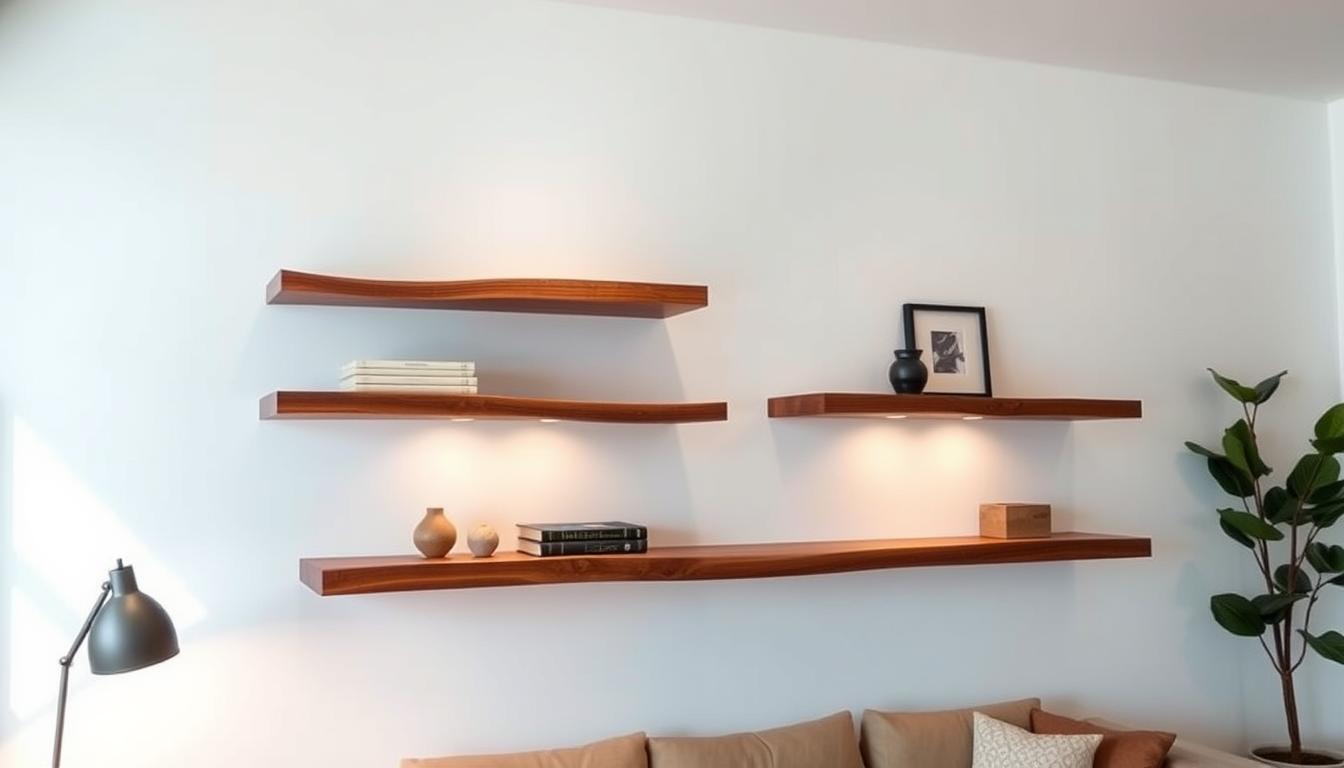
Creative Styling and Decor Inspirations
Transform your space by blending modern minimalism with rustic charm using live edge shelves. These unique pieces can elevate any room, creating a focal point that draws admiration. Whether in the kitchen, bedroom, or bathroom, live edge shelves offer a versatile way to combine natural beauty with contemporary design.
For a modern look, pair sleek lines with the organic charm of natural wood. In the kitchen, use live edge shelves to display glassware or plants, adding a touch of warmth. In the bedroom, they can hold decorative items or books, creating a cozy yet elegant atmosphere. Bathrooms can also benefit, with smaller shelves for toiletries or towels.
| Room | Style Tips | Accessories |
|---|---|---|
| Kitchen | Modern minimalism with natural wood accents | Glassware, potted plants |
| Bedroom | Rustic charm with sleek lines | Decorative boxes, books |
| Bathroom | Functional elegance | Toiletries, towels |
Draw inspiration from Amazon listings and custom woodwork sites. Thoughtful styling can turn live edge shelves into artful statements. Experiment with color coordination and accessory placement to enhance their natural beauty, creating a personalized environment that reflects your style.
Enhancing Functionality with Hidden Features
Discover how hidden drawers and compartments can elevate your storage solutions to the next level. By integrating these clever features, you can maximize functionality while maintaining a sleek, modern aesthetic.
Incorporating Hidden Drawers and Storage
Adding hidden storage to your shelves is a great way to keep small items out of sight while maintaining a clean look. This is especially useful in bedrooms for storing jewelry or in kid-friendly areas for hiding tiny toys. The key is to plan these features during the design phase to ensure they blend seamlessly into the overall design.
| Room | Hidden Storage Idea | Items to Store |
|---|---|---|
| Bedroom | Small drawers in the shelf | Jewelry, accessories |
| Kitchen | Hidden compartment | Spices, recipe cards |
| Living Room | Sliding panel | Remote controls, coasters |
When planning, consider the size and placement of each hidden feature. For example, a small drawer in a bedroom shelf can be perfect for jewelry, while a hidden compartment in the kitchen can store spices. The goal is to create a balance between functionality and style, ensuring that the hidden features remain accessible yet inconspicuous.
Experiment with different designs to find the perfect fit for your space. Whether it’s a sliding panel or a hidden drawer, these features can add both practicality and a touch of elegance to your shelves. By thinking outside the box, you can create a storage solution that is both functional and visually appealing.
Practical Tips and Troubleshooting Common Issues
Every DIY project comes with its own set of challenges, but with the right approach, these can be easily overcome. Whether you’re dealing with installation hiccups or maintenance mishaps, this section will guide you through practical solutions to ensure your project turns out perfectly.
Solving Installation Challenges
One of the most common issues during installation is ensuring the shelf is level. To fix this, use a spirit level and adjust the brackets until the shelf is perfectly aligned. If the shelf feels unstable, double-check that all brackets are securely fastened to the wall studs. For a more secure fit, consider using heavy-duty hardware available on Amazon or at your local hardware store.
Maintenance and Longevity Advice
To keep your shelves looking their best, regular maintenance is key. Dust the shelves weekly and clean any spills immediately to prevent stains. For tougher stains, use a mild wood cleaner and a soft cloth. Avoid harsh chemicals that could damage the finish. Additionally, inspect the hardware every few months to ensure it remains tight and secure.
For kid-related mishaps, such as accidental knocks or spills, act quickly to clean up and assess any damage. Small scratches can often be touched up with a wood marker or polish. More significant issues might require professional attention but are generally easy to fix with the right tools and materials.
Here are some quick tips to keep your shelves in top shape:
- Regularly inspect and tighten hardware to prevent wobbling.
- Use felt pads under decorative items to protect the wood surface.
- Keep the shelves away from direct sunlight to avoid fading.
By following these practical tips and staying proactive, you can enjoy your beautiful and functional shelves for years to come. Remember, a hands-on approach and careful planning make every DIY project easy to manage and rewarding.
Sustainable Sourcing and Design Considerations
Sustainably sourced hardwoods like oak and maple are top choices for creating durable and stylish shelves. These woods are prized for their strength and natural beauty, making them ideal for shelves that blend seamlessly into any home decor.
Using reclaimed wood offers significant environmental benefits. It reduces the demand for new timber and gives old wood a new life. Eco-friendly finishes further enhance sustainability without compromising on style or durability. This approach ensures your shelves remain structurally sound while supporting eco-conscious practices.
When planning your project, consider requesting hardwood samples from reputable sources like Hardtwood Custom Woodworks or Amazon. Reviewing finish options beforehand helps you make informed decisions. Sustainable design not only benefits the environment but also contributes to a healthier living space, ensuring your home remains beautiful for years to come.
Conclusion
Creating your own edge floating shelf is a rewarding project that combines functionality with natural beauty. By following the step-by-step guide and expert tips, you can craft a unique storage solution that enhances any room in your home.
Remember to measure carefully and plan every detail, from selecting durable wood to securing the shelf with sturdy hardware. These steps ensure your project is both stable and visually appealing. Don’t forget to order your supplies from trusted sources like Amazon or local hardware stores to guarantee quality and reliability.
Transform your space by seeing the potential of a custom floating wall shelf. Whether it’s for displaying decor or storing essentials, your creation will be a one-of-a-kind piece that reflects your personal style. Take pride in your handiwork and enjoy the process of bringing your vision to life!