Installing Snow White Wood Flooring: Pro Tips & Techniques
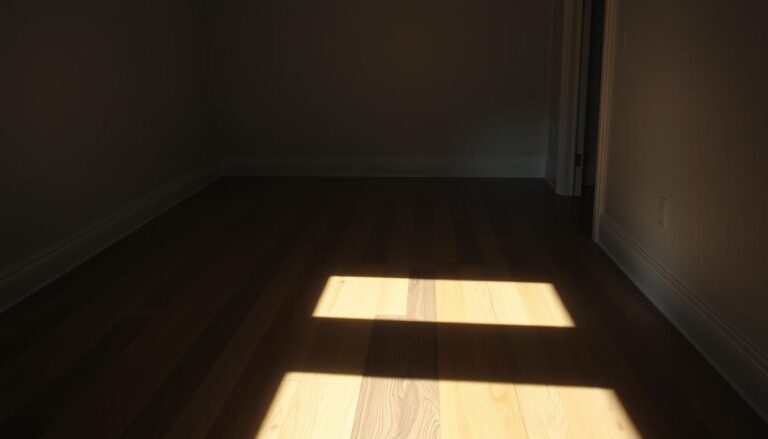
More than 70% of homeowners in the U.S. choose snow white wood flooring for their homes. It’s loved for its beauty and durability. Installing it right is key to enjoying its benefits, like making rooms look brighter and feel larger.
Installing snow white wood flooring requires attention to detail. From start to finish, each step is important. By using the right techniques and materials, your flooring will look great and last long. Whether it’s for one room or your whole house, the right steps make a big difference.
Starting your snow white wood flooring project? Knowing what to expect and how to get the best results is crucial. With the right guidance, you can create a beautiful and functional space that you’ll love for years.
Key Takeaways
- Proper installation techniques are crucial for snow white wood flooring
- White wood flooring can make a room feel more spacious and bright
- Attention to detail is key to a successful installation
- Using the right materials and techniques can ensure a long-lasting finish
- Understanding the benefits and challenges of snow white wood flooring is essential before starting the installation process
- Correct installation of snow white wood flooring can increase the value of your home
Understanding Snow White Wood Flooring
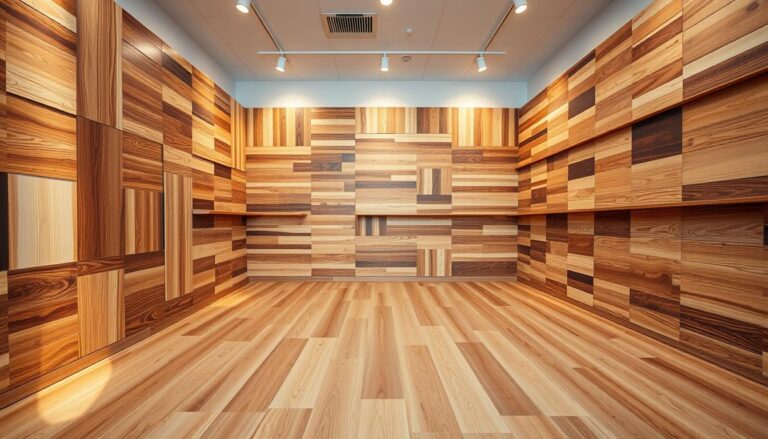
Choosing the right snow white wood flooring is crucial. You need to know the different types available. These include solid hardwood, engineered wood, and laminate. Each has its own pros and cons, so research is key.
Snow white wood flooring is durable, looks great, and is affordable. Solid hardwood lasts long with care. Engineered wood is cheaper but still looks good. Laminate is easy to install and budget-friendly.
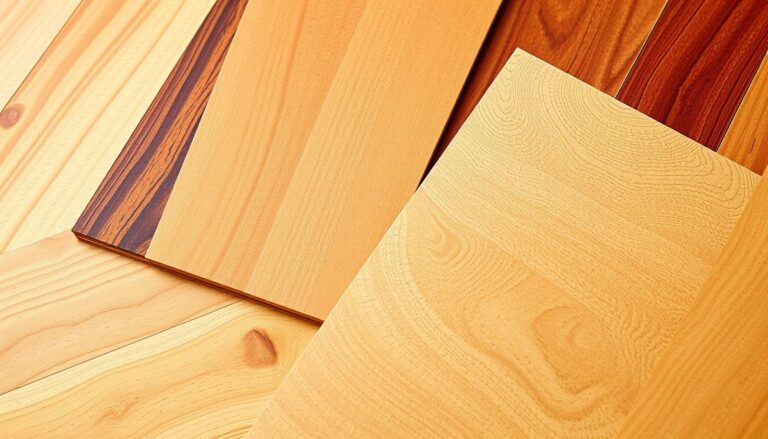
Types of White Wood Flooring
- Solid Hardwood: Known for its durability and classic look
- Engineered Wood: A cost-effective option that can still provide a similar look and feel to solid hardwood
- Laminate: A popular option that is known for its ease of installation and affordability
Think about your space’s needs when choosing flooring. For busy areas, solid hardwood is best. For a budget, laminate works well. Knowing the types and their benefits helps you choose wisely.
Benefits of Snow White Wood Floors
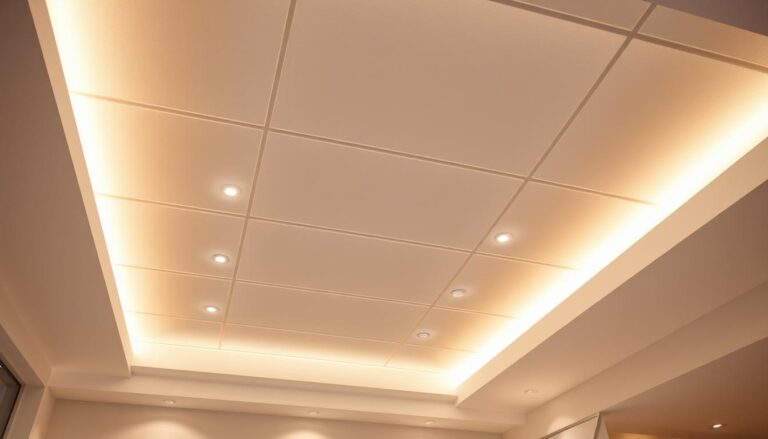
Snow white wood floors add elegance and sophistication. They’re durable and can last decades. They also brighten rooms and make them feel larger.
Cost Considerations
The cost of snow white wood flooring varies. It depends on the type and your space’s size. Costs range from $3 to $15 per square foot. Remember to factor in installation, maintenance, and repairs.
| Type of Flooring | Cost per Square Foot |
|---|---|
| Solid Hardwood | $5-$15 |
| Engineered Wood | $3-$10 |
| Laminate | $1-$5 |
Essential Tools and Materials Checklist
To install snow white hardwood floors, you need the right tools and materials. You’ll need a tape measure, pencil, and safety glasses. These are key for measuring, marking, and keeping yourself safe.
A flooring nailer and a miter saw are also vital. It’s important to note that using high-quality tools makes a big difference. A good flooring nailer ensures nails are driven correctly, and a miter saw helps you make accurate cuts.
Here is a list of tools and materials you’ll need:
- Tape measure
- Pencil
- Safety glasses
- Flooring nailer
- Miter saw
- Underlayment material
- Moisture barrier
When looking for tools to install snow white hardwood floors, consider your project’s specific needs. You might need extra tools or materials, like a humidistat or dehumidifier, for a successful installation.
Having the right tools and materials helps you install efficiently and effectively. Always follow the manufacturer’s instructions for each tool and material to ensure a successful installation.
| Tool/Material | Description |
|---|---|
| Tape measure | Used for measuring the room and flooring |
| Flooring nailer | Used for securing the hardwood flooring |
| Underlayment material | Used for providing a smooth surface for the flooring |
Preparing Your Space for Installation
Before you start, it’s key to prepare your space for snow white wood flooring. First, remove any old flooring to get a smooth surface. Be careful not to damage the subfloor, as this could cost a lot to fix later.
Clear the room of furniture and anything else that might get in the way. Then, take out the old flooring. This could be hardwood, tile, or carpet. Always wear gloves and a mask to protect yourself from injury and allergens.
Removing Existing Flooring
Removing old flooring takes time but is a must for a good installation. You might need tools like a pry bar or a flooring removal tool. These help loosen and remove the old flooring.
Subfloor Inspection
After removing the old flooring, check the subfloor for damage or unevenness. This is vital for a lasting installation. Look for water damage, cracks, or uneven spots and fix them if needed.
Moisture Testing Requirements
Lastly, do moisture tests to make sure the subfloor is dry. This step prevents water damage and ensures your flooring lasts. Use a moisture meter to check the subfloor’s dryness before installing.
Acclimating Your Snow White Wood Flooring
Installing snow white wood flooring requires acclimation. This step lets the flooring adjust to the site’s temperature and humidity. It prevents warping or buckling. Acclimation ensures a smooth installation.
The acclimation time varies, from days to a week. It depends on the flooring type and the environment. Keep the flooring in the site, away from sunlight and moisture. This helps the wood adjust to the local conditions.
Acclimating your flooring has many benefits:
- Reduced risk of warping or buckling
- Improved stability and durability
- Enhanced appearance and finish
Acclimation makes your flooring beautiful and durable. It’s a key step for quality flooring. 
Proper acclimation is vital for a great flooring installation. Follow these steps for beautiful flooring that lasts.
Subfloor Preparation Techniques
Installing snow white wood flooring needs a well-prepared subfloor. You must prepare the subfloor with several techniques for a smooth installation. First, check the subfloor’s condition and fix any issues before starting.
Preparing the subfloor for snow white wood flooring requires careful attention. The subfloor must be level, clean, and dry. Use self-leveling compounds for uneven spots and moisture barriers to prevent water damage.
To fix squeaks or loose boards, use screws to secure them. This step prevents movement and noise under the flooring. By following these steps, you’ll have a successful installation and enjoy your flooring for years.
Leveling the Surface
- Use self-leveling compounds to fill in low spots
- Check the subfloor for any cracks or unevenness
- Make any necessary repairs before proceeding with the installation
Installing Moisture Barriers
Installing moisture barriers is key in subfloor preparation for snow white wood flooring. It prevents water damage and keeps your flooring lasting longer.
Layout Planning and Room Measurement
Measuring rooms for snow white wood flooring is key. You need to measure the room’s length, width, and any odd shapes. This helps plan the flooring layout and the plank direction.
Begin by measuring the room with a tape measure. Record the longest and widest points. Note any heating vents, doorways, or columns. Also, remember the location of electrical outlets or switches.
After getting your measurements, plan the flooring layout. Think about the flooring direction and how it will look in the room. You might want a staggered joint pattern for interest. Use an online room planner or a pro for a custom design.

- Use a laser level for accurate measurements
- Double-check your numbers with multiple measurements
- Remember the flooring and underlayment thickness
- Leave a 1/4 inch gap around the room for expansion
By following these tips and carefully measuring and planning, you can achieve a stunning and professional-looking snow white wood flooring installation. It will enhance your room for years.
Installation Methods for Snow White Wood Flooring
There are several ways to install snow white wood flooring. Each method has its own benefits and drawbacks. The best choice depends on your flooring type, subfloor condition, and personal taste. We’ll look at the nail-down, glue-down, and float installation methods.
The nail-down method is popular for its stability. It involves nailing the flooring to the subfloor with a nail gun. The glue-down method uses adhesive on the subfloor to attach the flooring. The float method installs the flooring over underlayment without attaching it to the subfloor.
Nail-Down Method
The nail-down method works well for solid hardwood and engineered wood. It’s strong but can be more work than other methods.
Glue-Down Technique
The glue-down method is best for concrete subfloors. It’s strong but can be pricier than other options.
Float Installation Process
The float method is good for existing floors or unsuitable subfloors. It’s quick but might not last as long as other methods.
Choosing the right installation method is key for a successful snow white wood flooring project. The right method ensures a beautiful and lasting installation that adds value to your home.
| Installation Method | Suitable For | Advantages | Disadvantages |
|---|---|---|---|
| Nail-Down Method | Solid hardwood, engineered wood | Strong and durable, suitable for most subfloors | Time-consuming and labor-intensive |
| Glue-Down Technique | Concrete subfloors | Strong and stable, suitable for large areas | Expensive, requires specialized equipment |
| Float Installation Process | Existing flooring, unsuitable subfloors | Quick and easy, suitable for small areas | May not be as durable as other methods |
Cutting and Fitting Techniques
When working on cutting and fitting snow white wood flooring, precision is crucial. You’ll need the right tools and methods for a top-notch finish. Essential tools include circular saws, miter saws, and jigsaws.
To get a snug fit, use tools like tapping blocks and pull bars. These help fit the flooring around things like heating vents and doorways. Remember to leave a small gap between the flooring and walls for expansion and contraction.
- Use a circular saw for straight cuts in the flooring.
- Choose a miter saw for angled cuts in the flooring.
- Opt for a jigsaw for curved cuts in the flooring.
By following these tips and using the right tools, you can get a professional finish when cutting and fitting snow white wood flooring.
Dealing with Doorways and Transitions
Installing snow white wood flooring can be tricky, especially with doorways and transitions. You must make sure the flooring types blend smoothly. Also, you need to adjust door frames to fit the new flooring.
To begin, check the door frames and make any necessary adjustments. This ensures they are level and secure. It helps create a seamless blend between the wood flooring and other types.
Door Frame Adjustments
Adjusting door frames is key when working with doorways and transitions. You can use shims or screws to fine-tune the frames. This ensures they align perfectly with the new flooring.
Installing Transition Strips
Transition strips are vital for smooth transitions between flooring types. They can be installed in several ways, like nails, screws, or adhesive. This makes the transition between different floors look great.
- Hardwood transition strips
- Laminate transition strips
- Carpet transition strips
Choose the right transition strip for your needs and flooring type. This ensures a beautiful, seamless finish.
By following these tips and using the right materials, you can achieve a stunning snow white wood flooring installation. It will look great and blend perfectly with other flooring types.
Managing Expansion Gaps
When you install snow white wood flooring, it’s key to manage expansion gaps. These gaps let the wood expand and contract naturally. You must figure out the right gap size for your flooring to move easily. Expansion gaps are vital in snow white wood flooring installation to avoid buckling and cracking.
To handle expansion gaps in snow white wood flooring, think about the wood type, room size, and temperature changes. A common rule is to leave a 1/4 inch gap between the flooring and walls. Use a moisture meter to check the wood’s moisture and adjust the gap size if needed.
- Calculate the expansion gap size based on the room size and wood type
- Use a moisture meter to check the moisture levels in the wood
- Leave a gap of about 1/4 inch between the flooring and the wall
By following these tips, you can make sure your snow white wood flooring is installed right. It will handle the wood’s natural expansion and contraction well. Always manage expansion gaps in snow white wood flooring to avoid damage and keep your floor looking great for a long time.

It’s crucial to manage expansion gaps in snow white wood flooring to keep your floor beautiful and durable. By carefully calculating the gap size and using the right materials, you can enjoy your snow white wood flooring for many years.
Special Considerations for Different Room Types
Installing snow white wood flooring in various rooms requires careful thought. Each room has its own challenges, like moisture, traffic, and use. These factors can affect how well the flooring lasts and looks.
Kitchen Installation Tips
Kitchens face high moisture and lots of foot traffic. To get it right, keep these tips in mind:
- Use a waterproof underlayment to protect the flooring from moisture damage
- Choose a flooring type that is resistant to scratches and stains
- Ensure proper ventilation to prevent moisture buildup
Bathroom Considerations
Bathrooms are all about dealing with moisture. Here’s what to do for snow white wood flooring:
- Use a moisture-resistant flooring type
- Ensure the subfloor is completely dry before installation
- Use a waterproof sealant around the edges of the flooring
Living Room Best Practices
The living room is all about looks and lasting quality. For snow white wood flooring, remember these tips:
- Choose a flooring type that complements the room’s decor
- Ensure the flooring is properly sealed to protect it from spills and stains
- Use area rugs to define different spaces within the room
Finishing Touches and Trim Work
Finishing touches and trim work are key to making snow white wood flooring look great. You’ll need to add trim and molding to cover any gaps between the flooring and walls.
To add these finishing touches, start by measuring and cutting the trim. Then, install baseboards and quarter rounds to fill in gaps. It’s important to pick trim that matches the flooring and room decor.
Some popular trim options for snow white wood flooring include:
- White oak trim
- Maple trim
- Pine trim
These trims can be stained or painted to match the flooring and room decor.

By following these steps and choosing the right trim, you can complete your snow white wood flooring installation beautifully.
| Type of Trim | Description |
|---|---|
| Baseboard | Covers the gap between the flooring and the wall |
| Quarter Round | Covers the gap between the baseboard and the flooring |
Post-Installation Care and Maintenance
Keeping your snow white wood flooring clean and well-maintained is key to its longevity. Sweep or vacuum the floor often to get rid of dirt and debris. For deeper cleaning, use a soft wood floor cleaner. But, be careful not to use too much water, as it can harm the wood.
To avoid scratches and dents, put felt pads on furniture legs. Also, use area rugs in busy spots. Proper care and maintenance are crucial for your floor’s look and life. Here are some helpful tips:
- Use a cleaning product specifically designed for wood floors
- Avoid using too much water, as it can damage the wood
- Place felt pads on the legs of furniture to prevent scratches
- Use area rugs in high-traffic areas to reduce wear and tear
By following these tips, you can keep your snow white wood flooring looking great for many years. Always check the manufacturer’s instructions for cleaning products. Also, test a small area first to make sure the product won’t harm the finish.
| Tip | Description |
|---|---|
| Regular Cleaning | Sweep or vacuum the floor regularly to remove dirt and debris |
| Gentle Cleaning Products | Use a gentle wood floor cleaner and avoid using too much water |
| Prevent Scratches | Place felt pads on the legs of furniture and use area rugs in high-traffic areas |
Troubleshooting Common Installation Issues
Installing snow white wood flooring can sometimes lead to common problems. These issues can be tricky to solve but with the right approach, you can overcome them. We’ve created a guide to help you tackle gaps, squeaks, and buckling.
Common problems include gaps, squeaks, and buckling. These can be caused by various factors like moisture or poor installation. To solve these, you need to find the root cause and fix it. This might involve re-doing the installation, adjusting the subfloor, or using special tools.
Addressing Gaps
Gaps can happen due to bad installation or the floor settling. To fix them, use wood filler and caulk. This will help blend the flooring with the wall seamlessly.
Fixing Squeaks
Squeaks often come from loose boards or bad installation. To solve this, screw the boards to the subfloor. Or, use a product designed to quiet squeaks.
Dealing with Buckling
Buckling is usually due to moisture or poor installation. To fix it, dry the floor and then re-install the flooring. This will make the surface even and smooth.

By using these tips, you can solve common installation problems. Always follow the manufacturer’s instructions and protect the flooring and subfloor.
| Issue | Cause | Solution |
|---|---|---|
| Gaps | Improper installation or settling of the floor | Use wood filler and caulk to fill in the gap |
| Squeaks | Loose boards or improper installation | Use screws to secure the boards or a squeak-eliminating product |
| Buckling | Moisture or improper installation | Use a combination of drying and re-installing the flooring |
Conclusion
Installing snow white wood flooring requires care and attention. By following this guide, you can get a beautiful, lasting floor. It will make your home look great. Remember, the right installation and care keep your floors looking new for years.
Enjoy the elegance of snow white wood floors in your home. They add warmth, durability, and style to any room. With the right care, your floors will become a valuable part of your home. You’ll be proud of your work and enjoy the beauty of your floors.